OMG, let’s talk about back-to-school braids!
So, like, back in the day when I was in high school, braids were EVERYTHING.
I remember my first day of senior year – I had this super cute French braid crown that I spent hours perfecting.
I was totally going for that effortless but chic vibe, you know?
It was one of those days where you want everything to be perfect.
My outfit was on point, I had my fave pair of jeans, and this adorable top that just screamed, “I’m ready to slay this year!”
But the braids? They were the real MVP. I got up extra early just to make sure every strand was in place.
My mom even helped me, which was kinda sweet and nostalgic. She used to braid my hair when I was a kid, so it felt like a full-circle moment.
Walking into school with my braided crown, I felt like a queen.
Everyone was complimenting my hair, and I was like, “Thanks, I just threw it together this morning,” (total lie, but who’s counting?). It gave me such a confidence boost to start the year off strong.
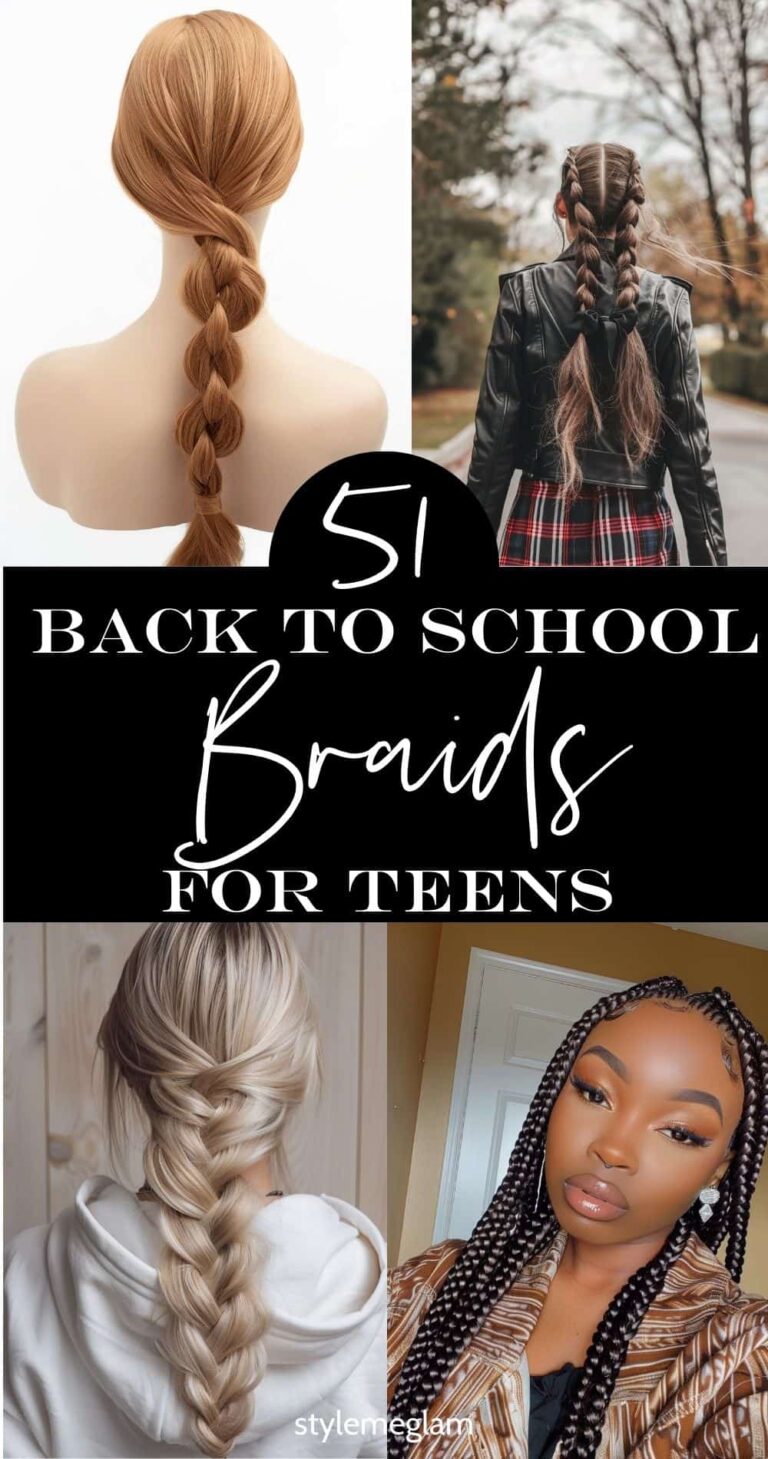
These days, braids are still a major vibe for back-to-school.
Whether it’s a classic French braid, a trendy fishtail, or even some cute little braided pigtails, it’s all about finding that style that makes you feel fabulous.
Plus, braids are perfect for those days when you just can’t even with your hair – they’re a lifesaver for sure!
So, if you’re gearing up for school and want to make a statement, definitely consider rocking some braids.
Let’s check them out.
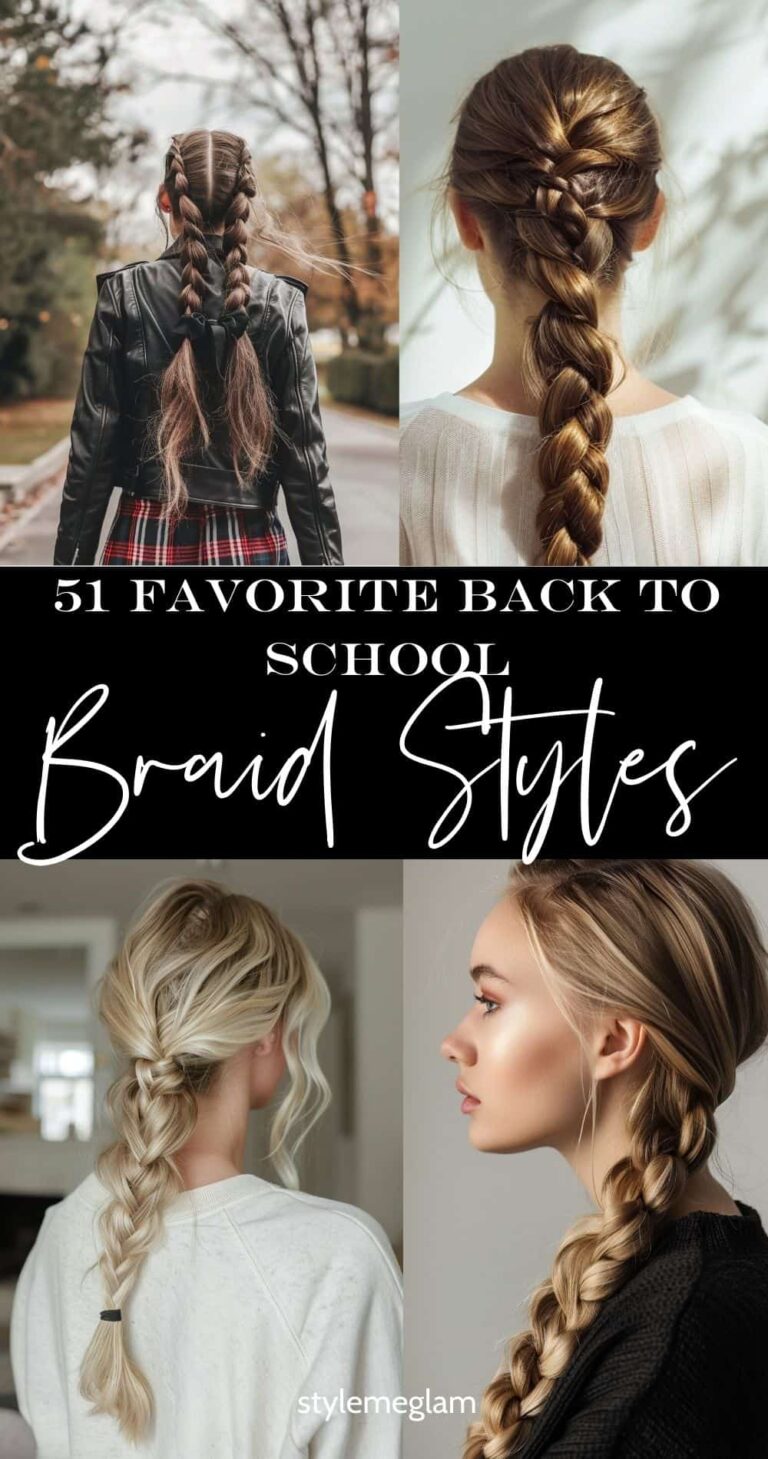
Back to School Hairstyle Braids
Alright, besties, let’s dive into a step-by-step tutorial for the ultimate back-to-school braids. Whether you’re a braid newbie or a pro, I got you covered with these easy and cute styles. Let’s go!
1. Classic French Braid
Perfect for: Keeping it classic and chic.
You’ll need: A hairbrush, hair ties, and some bobby pins.
Steps:
- Brush it out: Start with brushed hair to avoid any tangles.
- Part your hair: Grab a section of hair at the crown of your head. Split it into three equal sections.
- Start braiding: Begin a standard braid by crossing the right section over the middle, then the left section over the middle.
- Add hair: As you continue, add a small section of hair to each strand before crossing it over the middle. Keep this going all the way down.
- Secure the end: Once you reach the nape of your neck and there’s no more hair to add, continue with a regular braid and secure it with a hair tie.
- Finish up: If you want extra hold, use some bobby pins to secure any loose strands. Optional: Gently tug on the braid to make it look fuller.
2. Fishtail Braid
Perfect for: A trendy, boho look.
You’ll need: A hairbrush, hair tie, and some hairspray.
Steps:
- Brush and part: Start with tangle-free hair. Split your hair into two equal sections.
- Begin the braid: Take a small piece of hair from the outer edge of the right section, cross it over, and add it to the left section.
- Repeat: Now take a small piece from the outer edge of the left section, cross it over, and add it to the right section.
- Continue: Keep alternating sides, taking small pieces from the outer edge and crossing them over until you reach the end.
- Secure: Tie the end with a hair tie.
- Fluff it up: Gently pull at the braid to make it look fuller and messier. Finish with a light mist of hairspray.
3. Dutch Braid
Perfect for: A bold, standout look.
You’ll need: A hairbrush, hair ties, and bobby pins.
Steps:
- Brush and section: Brush your hair and section off a portion at the crown of your head.
- Start braiding: Split this section into three parts. Unlike a French braid, cross the strands under the middle section.
- Add hair: As you cross the strands under, add small sections of hair from the sides.
- Continue: Keep braiding in this manner, adding hair and crossing strands under, until you reach the nape of your neck.
- Finish off: Continue with a regular braid and secure with a hair tie.
- Adjust: Pull gently on the braid to make it look more voluminous. Secure any loose strands with bobby pins.
4. Braided Pigtails
Perfect for: A fun, playful look.
You’ll need: A hairbrush, hair ties, and some small clear elastics.
Steps:
- Part your hair: Create a middle part from your forehead to the nape of your neck.
- Section off: Divide your hair into two equal sections, one on each side of your head.
- Braid each section: Starting on one side, create a regular three-strand braid or mix it up with a French or Dutch braid.
- Secure: Tie the end of the braid with a clear elastic.
- Repeat: Do the same on the other side.
- Finish: Fluff up the braids and pull out some face-framing strands for a softer look.
Tips for All Braids:
- Prep: If your hair is slippery, use a bit of texturizing spray or dry shampoo for extra grip.
- Hold: Use bobby pins to secure any flyaways or loose sections.
- Volume: For a fuller look, gently pull apart the sides of the braid.
- Accessories: Add cute hair clips or ribbons for an extra touch of style.
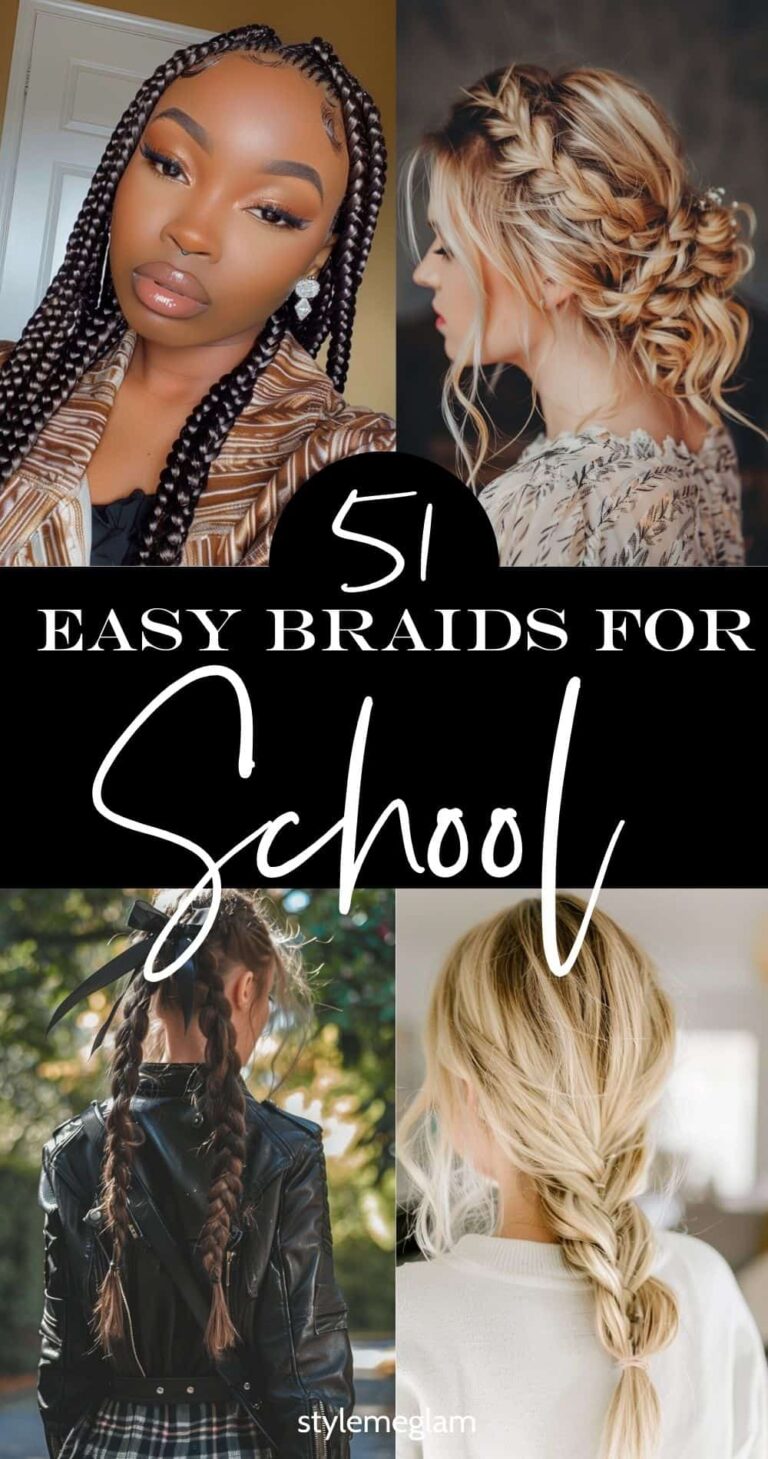
Side Part Fulani Braids
If you really want some stylized braids for your black women hair then fulani braids are for you. Let’s check out some ideas.
These braids are not just a hairstyle; they’re a statement.
Inspired by the Fulani people of Africa, they’re chic, cultural, and absolutely stunning.
5. Freestyle Fulani Braids
6. Classic Fulani Braids
7. Popular Styles
8. Island Twist
9. Pretty Fulani Braids
10. Styled Fulani Braids
Braided Hairstyles for Teens
Let me go back in time and rediscover fun and easy braided hairstyles for teens!
Whether you’re looking for something simple or a bit more intricate, these styles will keep you looking fresh and fabulous.
Here are a few ideas with step-by-step tutorials to help you nail these looks!
11. Double Dutch Braids
Perfect for: A sporty and stylish look.
You’ll need: A hairbrush, rat-tail comb, and hair ties.
Steps:
- Part your hair: Create a clean middle part from your forehead to the nape of your neck.
- Section off one side: Clip one side out of the way so you can focus on the other.
- Start braiding: Take a small section from the front of the loose side, split it into three parts, and begin a Dutch braid (crossing the strands under instead of over).
- Add hair: As you braid, add small sections of hair from the sides into the braid. Continue this until you reach the nape of your neck.
- Finish with a regular braid: Once you’re out of hair to add, continue with a regular braid down to the ends and secure with a hair tie.
- Repeat on the other side: Do the same on the other side, and you’re done!
12. Pull-Through Braid
Perfect for: A voluminous, intricate look that’s easier than it seems.
You’ll need: Small clear elastics, a rat-tail comb, and hairbrush.
Steps:
- Brush and section: Brush your hair back and gather a small section from the top of your head. Secure it with a small elastic.
- Create another section: Just below the first section, gather another section of hair and secure it with another elastic.
- Split and pull: Split the first ponytail into two parts and pull the second ponytail up between them. Clip the second ponytail out of the way.
- Combine and repeat: Gather another section of hair, adding it to the split sections of the first ponytail, and secure it with an elastic. Release the second ponytail and repeat the process.
- Continue to the ends: Keep repeating this process until you reach the end of your hair, then secure with an elastic.
- Fluff the braid: Gently pull on the sections to create a fuller, more voluminous braid.
13. Waterfall Braid
Perfect for: A romantic, elegant look.
You’ll need: A hairbrush, rat-tail comb, and hair ties.
Steps:
- Part your hair: Create a deep side part for a more dramatic look.
- Start the braid: Take a small section of hair from the front and split it into three strands. Begin a regular braid.
- Drop a strand: As you braid, drop the bottom strand and pick up a new section of hair from the top to replace it.
- Continue: Keep dropping the bottom strand and adding new hair from the top as you braid around your head.
- Secure the end: Once you reach the other side of your head, secure the braid with a small elastic or bobby pin.
- Adjust: Gently pull on the braid to make it fuller and more relaxed.
14. Braided Headband
Perfect for: Keeping hair out of your face while looking cute.
You’ll need: A hairbrush, rat-tail comb, and bobby pins.
Steps:
- Section the front: Take a small section of hair from one side of your head, near your ear.
- Create a braid: Braid this section all the way to the ends and secure with a small elastic.
- Cross the braid: Pull the braid over the top of your head like a headband.
- Secure: Use bobby pins to secure the braid behind your opposite ear.
- Blend: Let the rest of your hair fall naturally, blending the ends of the braid into your hair.
15. Halo Braid
Perfect for: A regal, boho look.
You’ll need: A hairbrush, rat-tail comb, and hairpins.
Steps:
- Part your hair: Create a middle part and divide your hair into two sections.
- Start braiding: Begin a Dutch braid at the nape of your neck on one side, braiding upwards towards your forehead.
- Continue around: Once you reach your forehead, continue the braid down the other side, following your hairline.
- Secure the end: When you reach the nape of your neck on the other side, continue with a regular braid and secure with a hair tie.
- Pin the braid: Wrap the braid around your head like a halo and secure the end with hairpins.
- Tuck and adjust: Tuck in any loose ends and adjust the braid for comfort and style.
Let’s get more braids for teens inspo!
16. Ladder Braid
17. Braided Bun
18. Box Braids
19. Milkmaid Braids
20. Knotless Braids
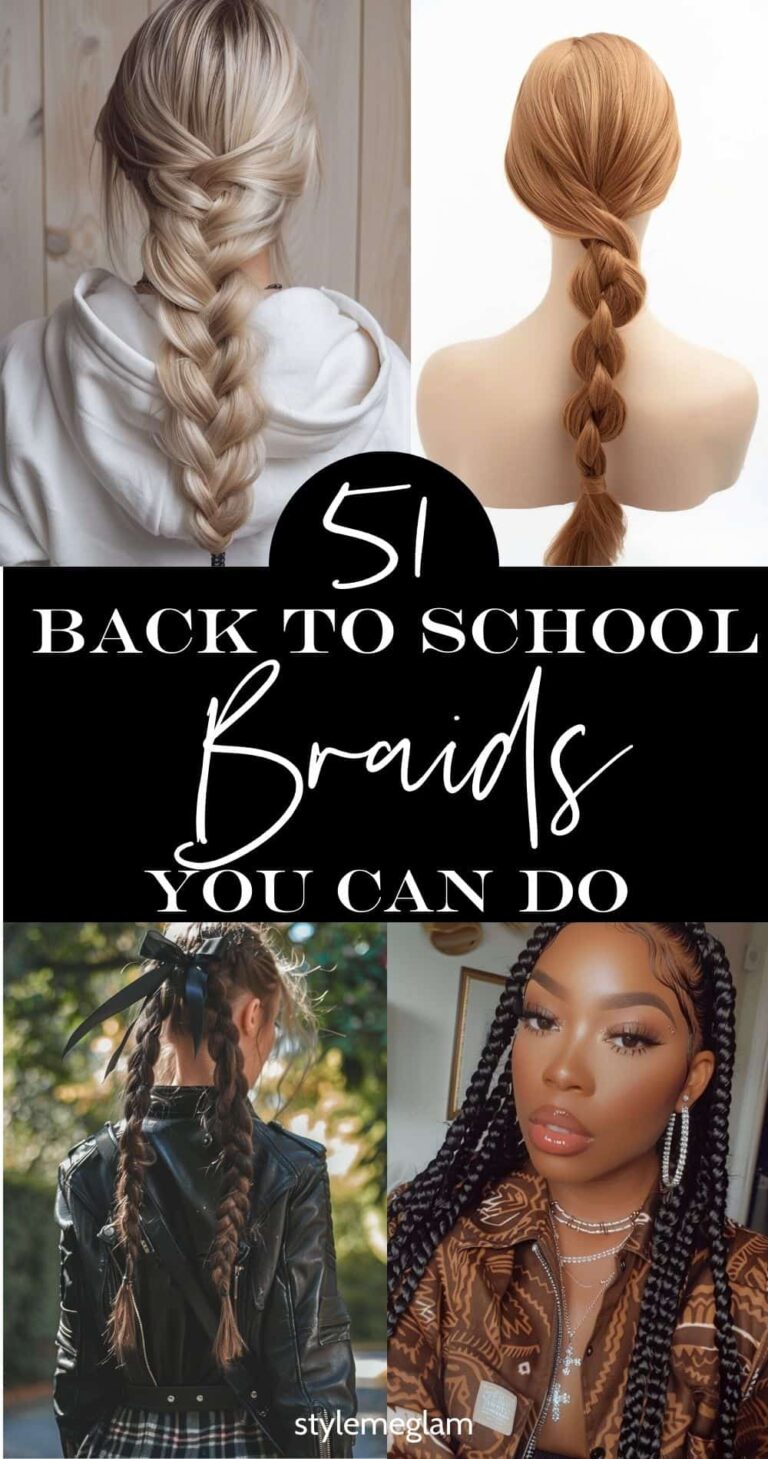
Quick Braided Hairstyles You Can Do
Sometimes, you wake up and realize you’ve hit the snooze button one too many times.
Or maybe you just want a hairstyle that looks like you put in a lot of effort without actually spending much time on it. That’s where quick braided hairstyles come in handy.
They’re versatile, stylish, and can be done in a matter of minutes.
One of the most beloved quick braided styles is the classic three-strand braid.
It’s simple, elegant, and never goes out of fashion. Whether you’re heading to school, work, or just running errands, this braid is a go-to.
It keeps your hair neat and out of your face, and you can easily dress it up with a cute hair accessory if you have an extra moment.
Another lifesaver is the half-up braided crown. It’s perfect for adding a touch of romance and sophistication to your look without a lot of fuss.
Just braid two small sections from each side of your head, bring them to the back, and secure them. It’s that easy!
This style is great because it keeps your hair away from your face while still allowing you to show off those luscious locks.
For those days when you want something a bit more polished, the fishtail braid is a fantastic option.
Despite its intricate appearance, it’s actually quite simple once you get the hang of it.
Plus, it gives your hair a beautiful, textured look that’s perfect for any occasion. It’s ideal for medium to long hair and works well whether your hair is straight, wavy, or curly.
The pull-through braid is another great option for a quick yet impressive style.
It gives the illusion of a complex braid but is super easy to do.
This style is perfect for adding volume and making your hair look thicker. It’s a fantastic choice for those with thinner hair who want to create a fuller look without spending too much time.
And let’s not forget about braided pigtails.
They’re not just for kids – when styled right, they can look incredibly chic and modern.
Braided pigtails are playful and fun, making them perfect for casual days or when you’re in the mood to add a bit of youthful flair to your outfit.
In the end, the best part about quick braided hairstyles is their versatility.
You can keep them sleek and tidy for a professional setting or mess them up a bit for a more relaxed, boho vibe.
So, let’s check some quick braided hairstyles you can do before school starts each morning.
21. Side Braid
22. Braid Ponytail
23. Braided Pigtails
24. Pull-Through Ponytail
25. Twisted Crown
30. Boho Braids
31. Braided Bangs
32. Double Dutch Braids
33. Four Strand Braid
34. Mohawk Braid
35. Loose Braid Updo
36. Soft French Braid
37. Hippie Braids
38. Bubble Braids
39. Add a Scarf
40. Space Braided Buns
Helpful Tips for Your Braids When You’re in School
School is a long day and you want your braided hair to look as good as it did in the morning. So let’s get these tips to help you.
41. Prep Your Hair Properly
- Before braiding, make sure your hair is clean and well-conditioned. This will help prevent breakage and ensure your braids last longer.
42. Use a Leave-In Conditioner
- Apply a leave-in conditioner or a light hair oil to keep your hair moisturized. Braids can cause your hair to dry out, so maintaining moisture is key.
43. Avoid Tight Braids
- Braiding too tightly can cause scalp irritation and hair breakage. Make sure your braids are snug but not too tight.
44. Protect Your Braids at Night
- Use a silk or satin scarf or bonnet to cover your braids while you sleep. This helps reduce friction and keeps your braids looking neat.
45. Keep Your Scalp Clean
- Use a gentle, clarifying shampoo or a scalp cleanser to keep your scalp clean. You can use a spray bottle to apply the cleanser between your braids.
46. Refresh Your Edges
- Use a bit of edge control gel and a soft brush to keep your edges looking neat. This helps maintain a polished look even as your braids age.
47. Try Different Styles
- Change up your look by experimenting with different braided styles. You can wear them down, in a high ponytail, a bun, or half-up half-down to keep things interesting.
48. Be Gentle When Removing Braids
- When it’s time to take out your braids, be patient and gentle. Use a detangler or conditioner to help ease out the braids and minimize damage.
49. Stay Hydrated
- Drink plenty of water to keep your hair hydrated from the inside out. Healthy hair is easier to manage and braid.
50. Schedule Touch-Ups
- If you’re wearing long-term protective styles like box braids, schedule regular touch-ups for the edges to keep them looking fresh and to avoid too much tension on new hair growth.
51. Give Your Hair a Break
- After wearing braids for a few weeks, give your hair a break before getting another set. This allows your scalp to rest and prevents over-manipulation.
Best Braided Hairstyles for Back to School
I hope you found the #1 hairstyle for back to school!
For more fashion, beauty and lifestyle tips, follow me on Pinterest!
Please pin me!